Steps:
- Create a new hard disk
- Create a physical partition
- Create the physical volume and volume group
- Create logical volume
- Create file system
- Mount the file system
- Grant ownership of the file system to oracle user
- Pre-Installation Steps
- Download and unzip the database files
- Perform Installation
- Post Installation Steps
- Verify if installed correctly
Step 1
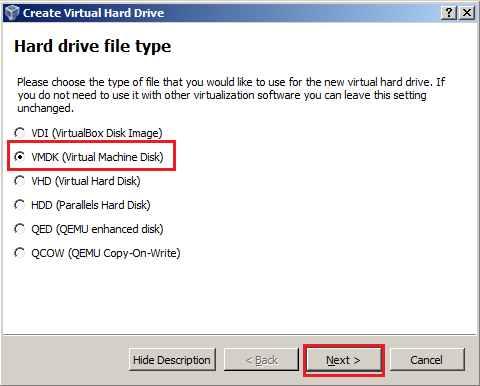
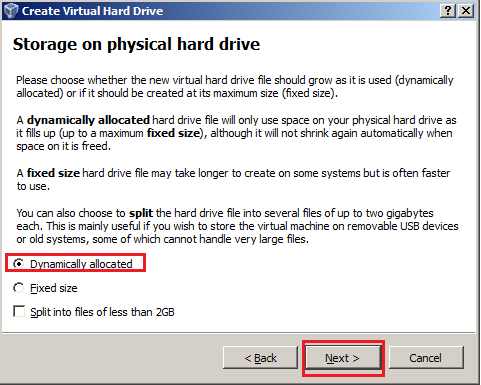
Add a new hard disk to the virtual machine to hold the oracle and all other software’s.

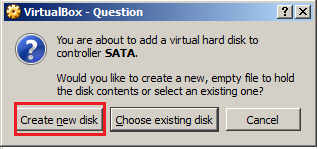


Start the machine.
Step 2
Login as root user. Here, the screen shots from putty are displayed. Otherwise, the command window on the guest machine can also be used.
Creation of physical partition on the new file system. Type fdisk /dev/sdb

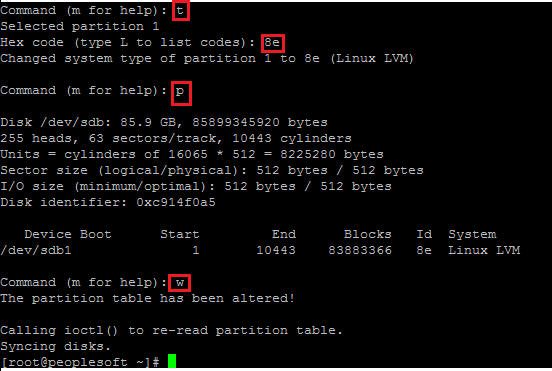
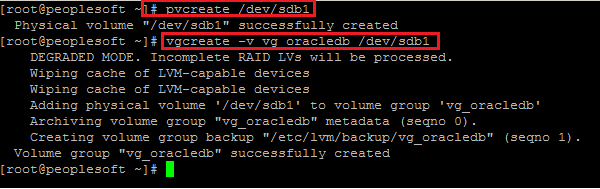
Step 3
Create the physical volume.
Type – pvcreate /dev/sdb1
Create Volume Group – vgcreate –v vg_oracledb /dev/sdb1
Step 4
Create a logical volume that has around 80GB of space.
lv –v –size 78g –name lv_oracledb vg_oracledb
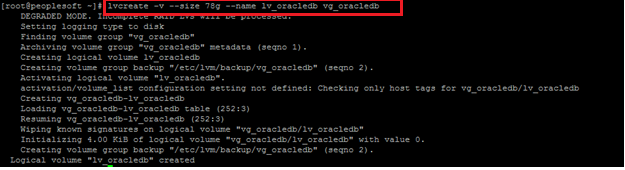
--size and --name are “minus” not hyphen
Step 5
Create filesystem – mkfs.ext4 –v /dev/mapper/vg_oracledb-lv_oracledb

Step 6
Finally mount the filesystem to a directory.
Create directory u01

Perform mount
mount -t ext4 /dev/vg_oracledb/lv_oracledb /u01


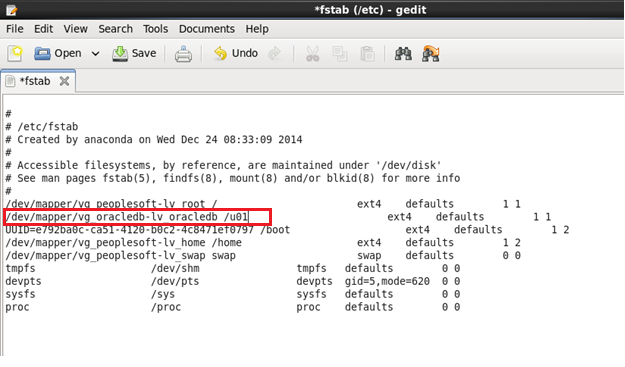
Make changes to the fstab file under /etc/fstab so that /u01 is mounted correctly when the system reboots. Add a line for the /dev/mapper/vg_oracledb-lv_oracledb to be mounted at /u01:
Step 7
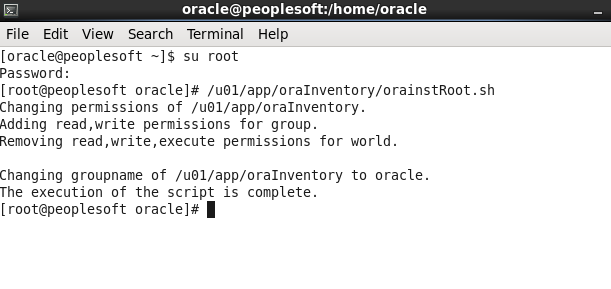
Grant ownership of /u01 to oracle.

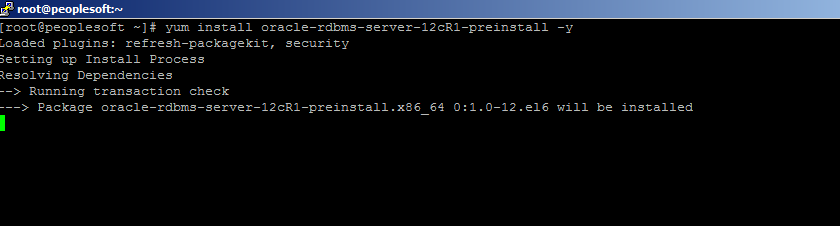
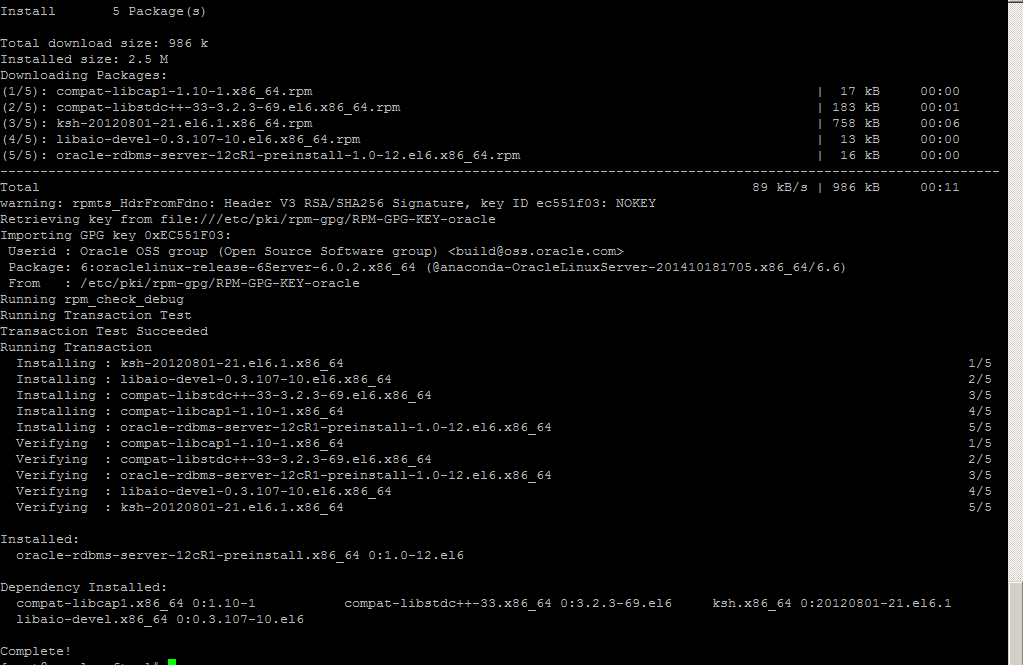
Step 8 – Pre Installation Steps
Install required packages.
Now, login as root and type the following command to prepare for oracle installation.
yum install oracle-rdbms-server-12cR1-preinstall -y
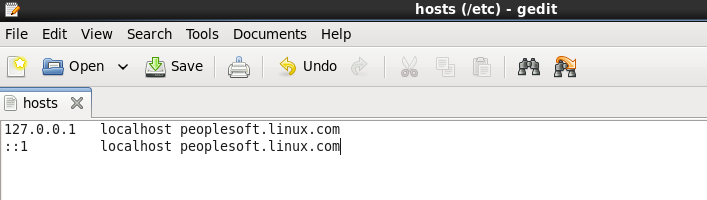
Add the hostname in the hosts file

Put this hostname in the hosts file under /etc
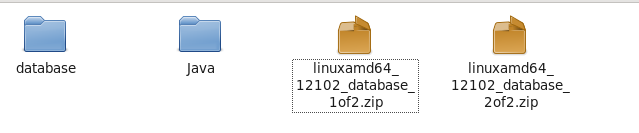
Step 9 - Download and Unzip the zip files.
Extract both the zip files to database folder.
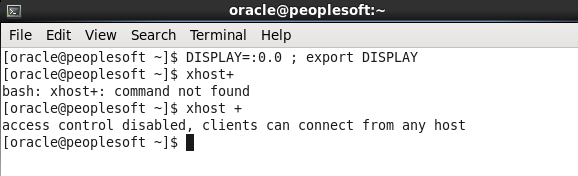
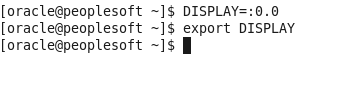
Login as root and set the DISPLAY variable.

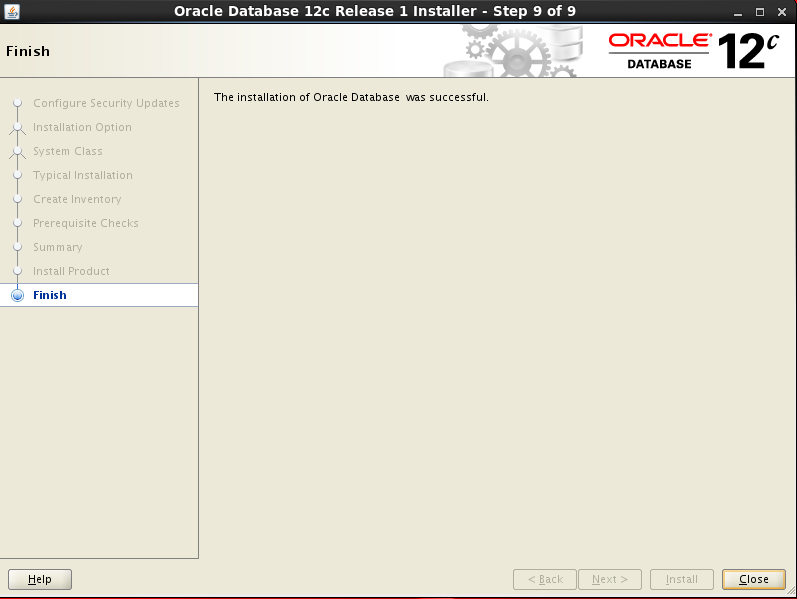
Step 10 – Perform Installation
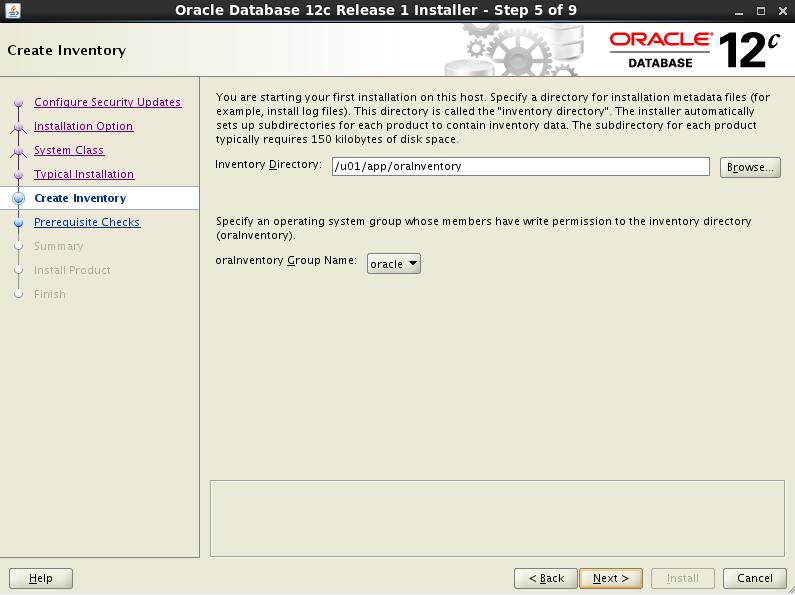
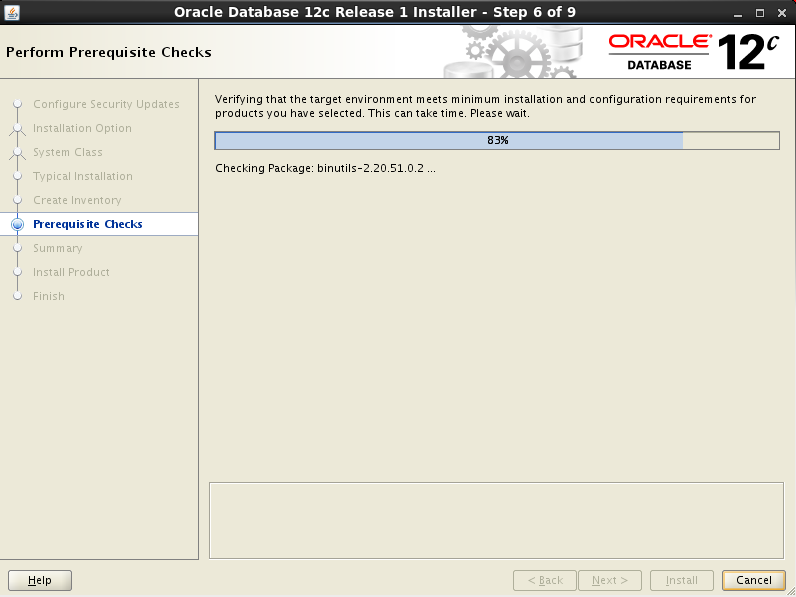
Login as oracle user and run the runinstaller file.


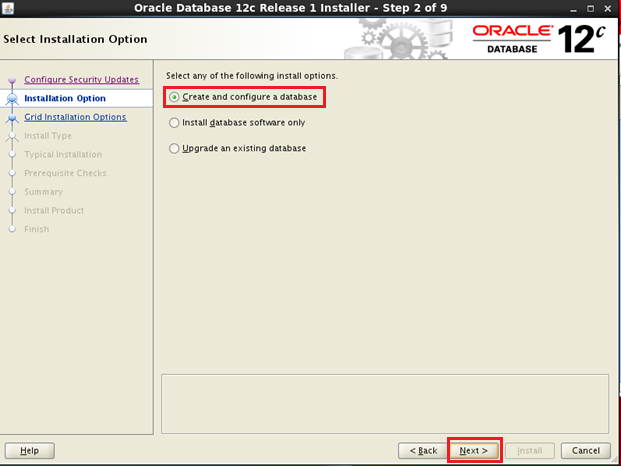
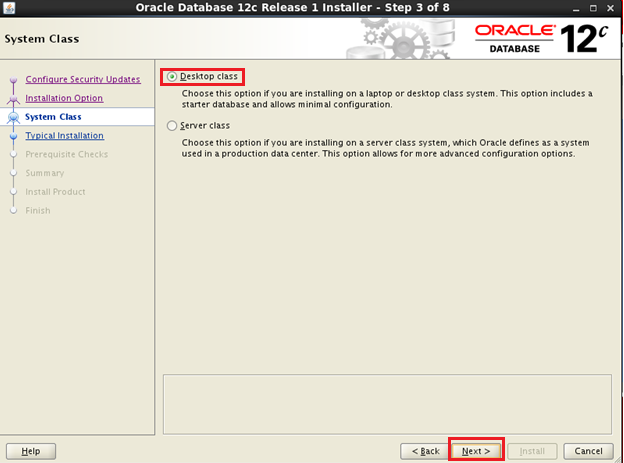
Enter all the details and click next.
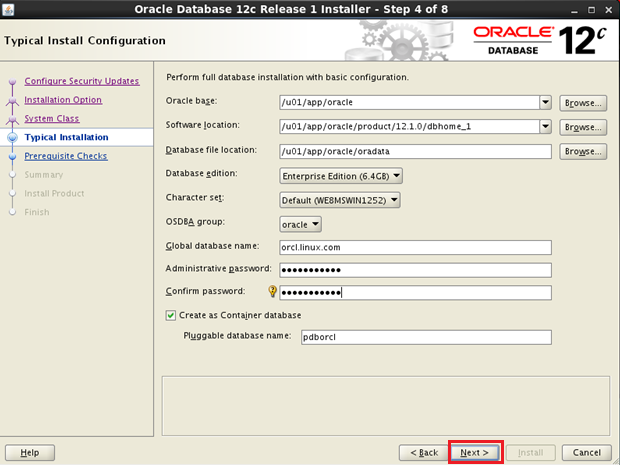
Password is Thought2014

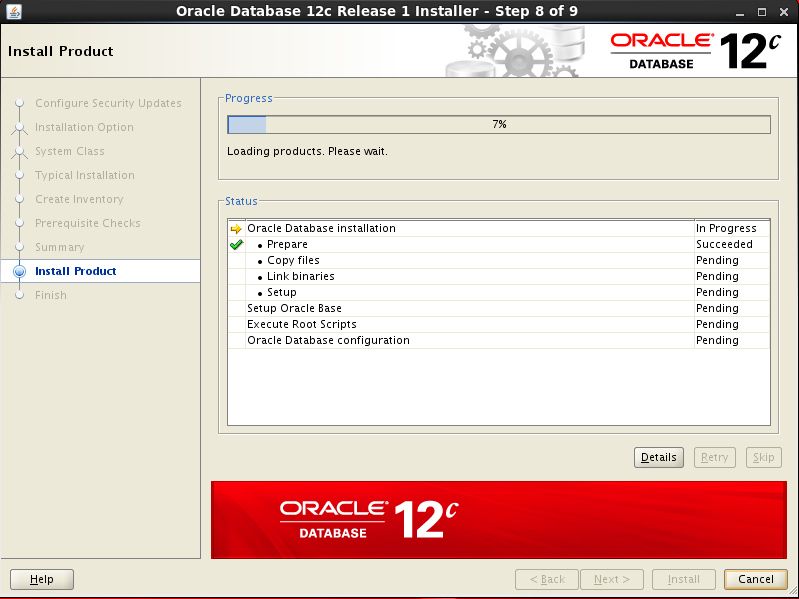

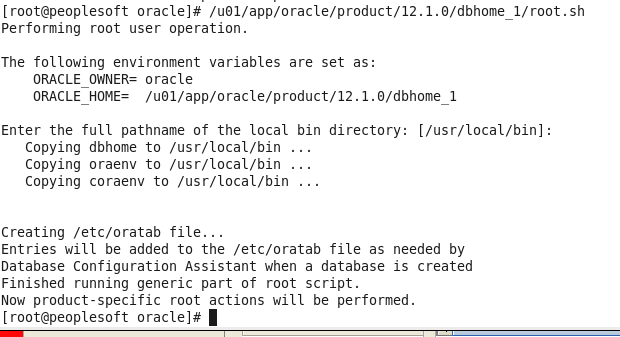
Run the above scripts as root user and click ok.

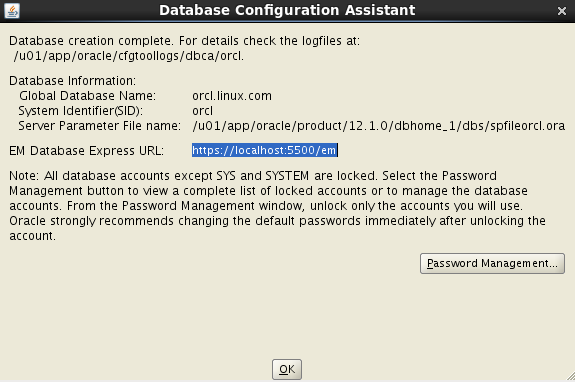
To automatically start the database whenever the machine starts put the following in the oratab file under /etc
Edit .bash_profile file under /home/oracle

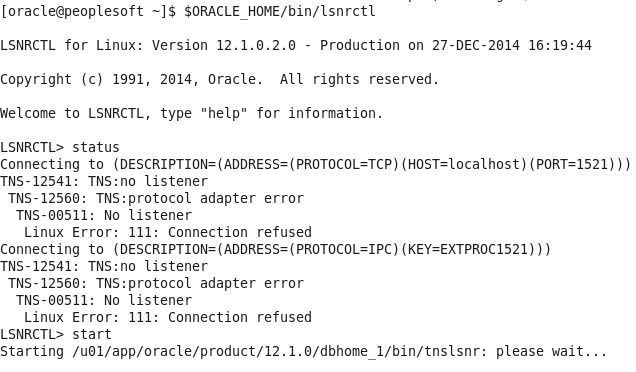
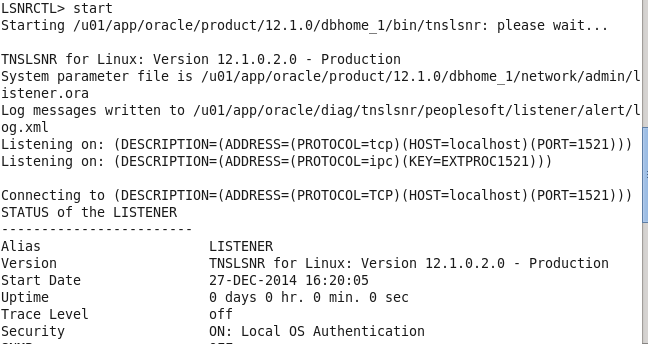
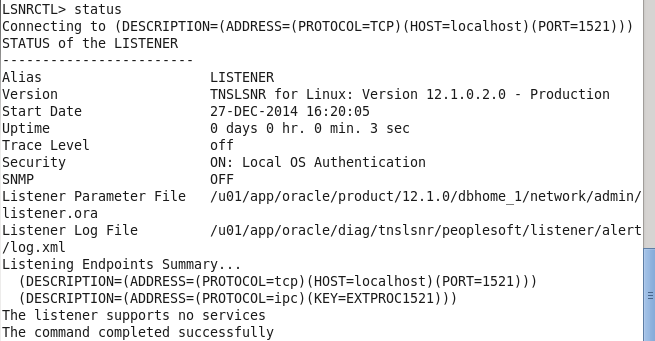
Start the listener.

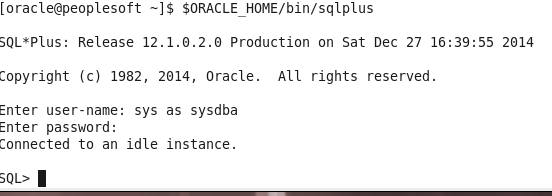
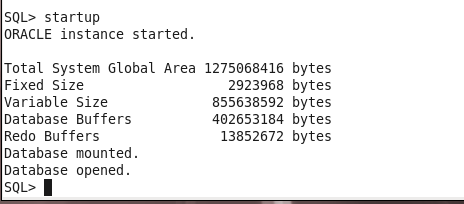
Step 11 - Verfiy
Login the sqlplus


Restart the listener and the database.
Nicely documented. Very useful. Thank a lot. Appreciate it.
ReplyDeleteThanks Ravi
ReplyDeleteWhere'd you get the folder "Java" from?
ReplyDeleteWhat is the command to populate data from an exported dump file. The parameter file has reference to the dump files.. but the >>impdp command not working very well. Any help guide?
ReplyDelete